


How to Edit Your .htaccess File
The .htaccess file contains directives (instructions) that tell the server how to behave in certain scenarios and directly affect how your website functions.
Redirects and rewriting URLs are two very common directives found in a .htaccess file, and many scripts such as WordPress, Drupal, Joomla, and Magento add directives to the .htaccess so those scripts can function.
You may need to edit the .htaccess file at some point, for various reasons. This article covers how to edit the file, but not what to change. (You may need to consult other articles and resources for that information.)
Methods to Edit a .htaccess File
- Edit the file on your computer and upload it to the server via FTP (FileZilla)
- Use an FTP program's Edit Mode (FileZilla)
- Use SSH and a text editor
- Use the File Manager in cPanel ⤵
The fastest and easiest way to edit a .htaccess file for most people is to use the File Manager in cPanel; this article covers how to edit using this method and applies to Linux web hosting, such as HostGator Shared, Reseller, VPS, and Linux Dedicated Servers.
HOW TO EDIT .HTACCESS IN CPANEL'S FILE MANAGER
Before we do anything, it is suggested that you backup your website so that you can revert back to a previous version if something goes wrong.
You may find some links below that will redirect you to your cPanel and its features provided that the following conditions are met:
- You are logged into your Customer Portal. You can also log in after clicking the link.
- The hosting package you are attempting to access is either a Shared or Cloud.
To access the .htaccess file:
- Log into cPanel.
- In the Files section, click on the File Manager to open.
- The File Manager displays different folders or website directories and website files - some of which are hidden. Select the directory you wish to access.
- To see the .htaccess file, click Settings in the upper right-hand corner.
- Make sure the Show Hidden Files (dotfiles) is checked. This will refresh the page and all files starting with a "." (dot) will be displayed.
- Click Save.
- Locate the .htaccess file in the list of files. You may need to scroll your cursor a little bit to find it.


To edit the .htaccess File:
- Go to your cPanel's File Manager.
- If you have a single domain, go to public_html to find the .htaccess file. (If you have other domains, access that domain's document root to edit the .htaccess.).
- Right-click on the .htaccess file and click Edit from the menu. Alternatively, you can click on the icon for the .htaccess file and then click on the Edit icon at the top of the page.
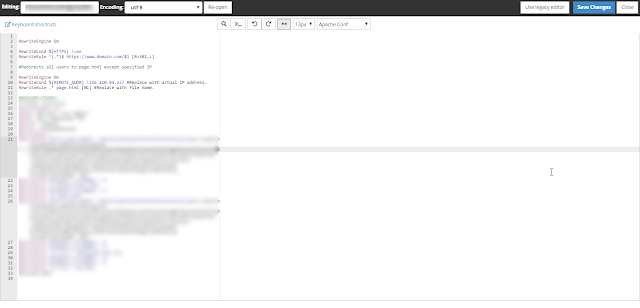
- A dialogue box may appear asking you about encoding. Just click Edit to continue. The editor will open in a new window.
- When entering the codes needed, for example, for Redirects and Rewrites, you can paste the whole code from the second line in .htaccess.


8.Once complete, you can click Close to exit out the File Manager window.
Note: Instead of using the cPanel method, many people find changing the .htaccess file via FTP or SSH an easy alternative.
----------------------------------------------------------------------


